Monday, December 29, 2014

2015 Is Bringing BIG Changes!

A New Year is coming, and it's bringing BIG changes!


For the past several months, I've been creating small projects for my Close To My Heart business, and posting them here.  While I have enjoyed the process greatly, I have come to realize that I am not selling enough Close to My Heart merchandise to support the animals here at the ranch, as I had originally hoped.  I will continue to be a CTMH Consultant, for as long as I can maintain the minimum sales required to do so, but I am now going to be focusing my energies on projects that I will be selling as "Completed Art Pieces".  I have been receiving a lot of encouragement to start selling the finished pieces, and I've decided to give it a go.  

I have been making "something from nothing" for the better part of my life.  My sister and I were "recycling", "upcycling", and "altering" items since long before it became the fashionable thing to do.  Thankfully, I have a barn FULL of items, patiently waiting for their turn to be turned into something FABULOUS!  So, the first items I pulled off the shelf were some old cabinet doors.  I wanted to paint some signs as Christmas gifts, and these old doors were going to make the perfect base.

I apologize for the quality of the pictures in this post.  I took them with my phone and didn't have a chance to get better pictures prior to giving them as gifts.  I will be spending the next few days creating more signs, and will happily post them when they are complete.

I plan to make several of these as Garden signs to sell at an upcoming Spring Sale.


My "Weed or Wish" sign has been very popular.  I need to get some more of these made up! 


I thought this was a lovely sentiment:


Well, that's about all I have for today.  I'd love to get your feedback on my signs.  I'll try to be a little better about posting more often, but between working at JoAnn's, keeping up with the Farm chores, regular household chores, and trying to create items to post (and sell) well, it's a juggling act to be certain!!!  If you are interested in obtaining information about any items you see posted on this blog, please feel free to leave a comment, or email me directly.

Happy New Year, dear friends!!!


Wednesday, December 17, 2014

Super Quick Christmas Decor Idea

Big Impact, Little Effort


First, let me apologize for the long gap in posting.  Like everyone at this time of year, I'm swamped with a list of "things to do".  Add to my normal hectic life, I've been working an average of 32 hours at the closest JoAnn Fabrics store (an hour away!!!)  I'm frantically trying to do my part to support the animals here at the ranch.  Anyway, I made these plates last week, but just haven't had one free minute to take pictures or write this post.  Thankfully, I have a couple days off from work, and I'm sick as a dog with a terrible head cold, so I'm taking the opportunity to write this post.

I few months ago, I went to Goodwill to pick up a large selection of white plates and platters for an idea I had for my garden fence.  Since I didn't get that project finished for "Gardening season", surprise, surprise, I decided to make some of them up for a quick Christmas Decoration.  The plates averaged .49 cents, and the platters were 1.49 each.  I bought up stacks of them!


I used Art Philosophy and Artiste cartridges to write the phrase components with the exception of the Happy New Year plate.  For that plate, I used an image from my subscription for the Cricut Explore Design Space.  Working with vinyl is a lot of fun, and SUPER easy!  The primary goal is to do a "kiss cut", so you are not cutting all the way through the backing material.  I will happily do a tutorial on the process at a later date, but sadly, the next week or so is going to be completely absorbed with finishing (or more honestly, starting) Christmas gifts, and just won't have a chance to do all the necessary photos for the tutorial.  If you are chomping at the bit to get started, I promise, there are LOTS of video tutorials all over Youtube.


For the "Walking in a Winter Wonderland set of plates, I used Art Philosophy again for the snowflake and lettering, except for Winter Wonderland.  For that, I actually used a font from my computer.  That is one of the real beauties of the new Cricut Explore machine.  I am not affiliated with ProvoCraft, or Cricut, but I am a huge fan of this machine! 


For my last set of plates, I used images from my design space subscription.  The only exception is the Deer with the bird in its antlers.  That image is from the new Artfully Sent cartridge.  I really love this little guy!

Anyway, I'm really sorry this is such a lack luster post, but I wanted to share this idea with you.  I think it could very easily translate to any season, or design idea.  The best part is that the vinyl is removable, so you aren't stuck storing the plates til next year.  You can scrape the vinyl off and design something for the next season.  In a really tiny home like mine, storage can be a bit of a problem.  Luckily for me, I have a barn, but to be completely honest, I have way too much stuff out there!


Here's one last look.  I hope you like it!

Wednesday, December 3, 2014

Altered Golden Book

My Little Christmas Planner


A few years ago, I made a little book for keeping my Christmas lists, craft ideas, sketches and so on.  That first book was made using chipboard and Christmas papers, and LOTS of embellishments.  I loved that little book.  I literally carried it everywhere with me, and when I found the perfect gift for someone, I made notes, either about where to purchase, or better yet, my ideas on how to create my own version of the item.  I was planning on showing pictures of that book, but as luck would have it, it was nowhere to be found.  I know I still have it.  It's just not where I thought it would be, lol!!!

Shortly after making that book, I saw a YouTube video of an altered book made from a Little Golden Book, and I thought it was a really cute idea.    If you'd like to watch that video, I have linked it here.   I thought it was a fun way to re-purpose a fond memory of not only my childhood, but also my children's.  I didn't want to destroy the wonderful artwork and story in the book, so rather then use the existing pages as a base for putting my own pictures on, I decided to add note pages, and dividers with pockets and tags, interspersed between the original story pages.


I used the Picture my Life cards from the Pear and Partridge pack as removable note cards.  The picture above is the back cover of the book.  I added a simple pocket to hold several of the cards that I thought would be nice if I needed to pass on a note or list to a friend or family member while out and about.  I always seem to be searching for a piece of paper to write something on when I'm out shopping, and I thought this was a much prettier way to give someone that information.


I have a pretty good collection of these Little Golden Books, (big surprise, lol!) so I pulled out a few of the Christmas themed ones and decided to use the Santa's Toy Shop book for my little planner.


The next step was to disassemble the book.  I simply cut the spine away.


Once I had the book apart, I started decorating the cover.  I used the Yuletide Carol Compliments for the title.  I also used the flower from the Mini Medley Accents Ruby Collection.  I added several vintage sequins that I've collected over the years, but new ones work just fine.  I have to admit, as much as I really like the Christmas collections Close To My Heart has this year, I have been using them so much lately, that I really wanted to take a break and use something different, so I dug through my stash and found some Christmas Paper Packs I had purchased a couple years ago.  Both were Recollections paper packs from Michaels.  


I honestly have no idea whether these papers are still available, but I'm sure there are plenty of options available out there.  Anyway, I used my Cricut Artbooking cartridge to create dividers.


On the opposite side of the divider, I cut a rectangle of a co-ordinating cardstock to make a pocket.


Once I had all my dividers made, I simply arranged stacks of writing paper, graph paper, dividers, original story pages, as well as the front and back covers in a way that I liked and punched the binding holes with my Cinch binding machine.  After punching the holes, I wound the coil through the holes and bent the ends to keep it from un-coiling.   

Here are a few more pictures:


Front cover with pocket also made from Artbooking and decorated with a cute sticker from Yuletide Carole Compliments.


Look, the pocket is the perfect size for the large Picture My Life cards!!


I love the original artwork in these books and I didn't want to lose any of it, so I just added the story pages in behind the note pages.


I added an envelope to one of my pockets.  You can certainly use your Cricut machine to create these envelopes, but I happened to have a package of them that I had purchased at Michaels, so I decided to use one of those.  Since I didn't custom make the envelope, it was a little to long, so I folded up the end and used another sticker from the Yuletide Carole Compliments to hold the fold in place.


As I stated earlier in this post, on the back cover, I made another pocket and added a bunch of Picture My Life cards in both sizes.  You know how we're always looking for something to write on when see someone at the store?  Well I thought I would use the cards to write what ever message or contact info I may want to give them.  Not only is it a pretty way to give that info, but I bet they will be less likely to lose something like this in the bottom of their purse or whatever.


So, that's it for today.  I'm soooooo sorry it took me so long to get this posted.  I had to go back to working outside the home to help support my rescue critters.  Between the 32 hour work schedule and the 1 hour drive each way to get to work, well, I'm really struggling to get everything done.  Not to mention the fact that I went back to working retail, which means being on my feet all day and lots of running around the store to help customers, which is REALLY proving to be hard on my legs and especially my joints.
I'm thankful for the job, as I would be crushed if I had to try to rehome the critters in my care.  I will do whatever is necessary to provide for them, including adding more to my already busy schedule.   I will try to keep my posts more regular, but please, bear with me while adjust to my new responsibilities.  I will be decorating this little planner and posting those pictures as well as  doing other more simple projects in the near future.  

One last note, this project is certainly NOT limited to a Christmas planner.  This would be adorable as a little scrapbook for a baby shower, or first day of school or really, just about anything you can think of.  Since there are literally thousands of Little Golden Book titles out there, I'm sure there's a book that will work for any project you may have in mind.  And trust me, no two finished altered books will ever be alike, so you know you are giving a unique gift, or creating something for yourself that no one else will ever duplicate exactly.

I hope you enjoyed this LONG post, lol.   


Monday, November 10, 2014

Best Wishes to You

Who doesn't love a cozy pair of Mittens?


I was cleaning my desk, thinking about what would be my next project, when I decided I would use the Snowhaven paper pack
to make at least one more card before putting it away for a while.  Don't worry, I'll still be making Christmas cards and projects for a little while yet.  Unfortunately, I may not get to make quite as many as I was planning, though.  I've decided to return to the work force, to help pay for the care of my MANY, MANY rescue animals.  I had hoped I would be able contribute with my crafting and my Close To My Heart business, but sadly, I'm just not bringing in enough to be of any help.  I'm a little worried my blogging will suffer, as there is only so many hours in a day.  I'm going to do my best to post at lease twice a week, but please, bare with me if I can only manage once.  Between the farm, the house, CTMH, blogging and now a new job, I'm feeling, well, a little overwhelmed!

OK, now that I've gotten that out of the way, let's get into today's card.  I started with a 5 x 5 card base of black cardstock.  The next layer was cut at 4.75 x 4.75 from one of the light blue patterned papers from Snowhaven. 


The next layer was cut at 3.75 x 4.5 from the black background with light blue polka dots, again, from Snowhaven.  I ran this piece of paper through my sewing machine to add a little interest to the edge.


Here's a closer look:


My next layer came from an old book that I had taken apart for previous project.  I cut this layer at 4.25 x 3.75


The next photo shows the lower border piece that I was planning on using, but later decided the striped ribbon added more pattern than was needed.  This card has plenty going on already, lol!!!  Anyway, I forgot to take a picture of the border piece without the ribbon.  Oops!


Even though I decided not to use the ribbon, I did decide to use Red Shimmer trim instead.  I stamped the sentiment from the Art Philosophy Seasons collection that comes with the Art Philosophy cartridge bundle.  I also used this cartridge to cut the scalloped circle that is the focal point of the card.


The mittens are from the Snowhaven Compliments chip board pieces.  I popped them up with a little 3-D foam tape.  I added some Clear Sparkles to the snowflakes on the mittens.  I used a small amount of Baker's Twine to connect the mittens.

That's it!  

As always, if you have any questions, just leave them in the comments section, and I will do my best to answer them as quickly as I can.

Also, don't forget to check out my "Meanwhile, back at the Ranch" page.  I've been adding more life stories of the many rescues here at the ranch.   That is also the page where I will be posting some of my more "Homestead" oriented topics.  I've had a few requests for more stories about our life at the ranch, so that seemed like the logical place to put them, lol!


Thursday, November 6, 2014

Winter Wishes

Snow Scene Shaker Card


I have a little spiral bound notebook that I like to scribble sketches in for possible cards or tags, or whatever.  I was flipping through it last night and came across the one that inspired this card.  I've been wanting to make a shaker card for a while, so this was the perfect opportunity.

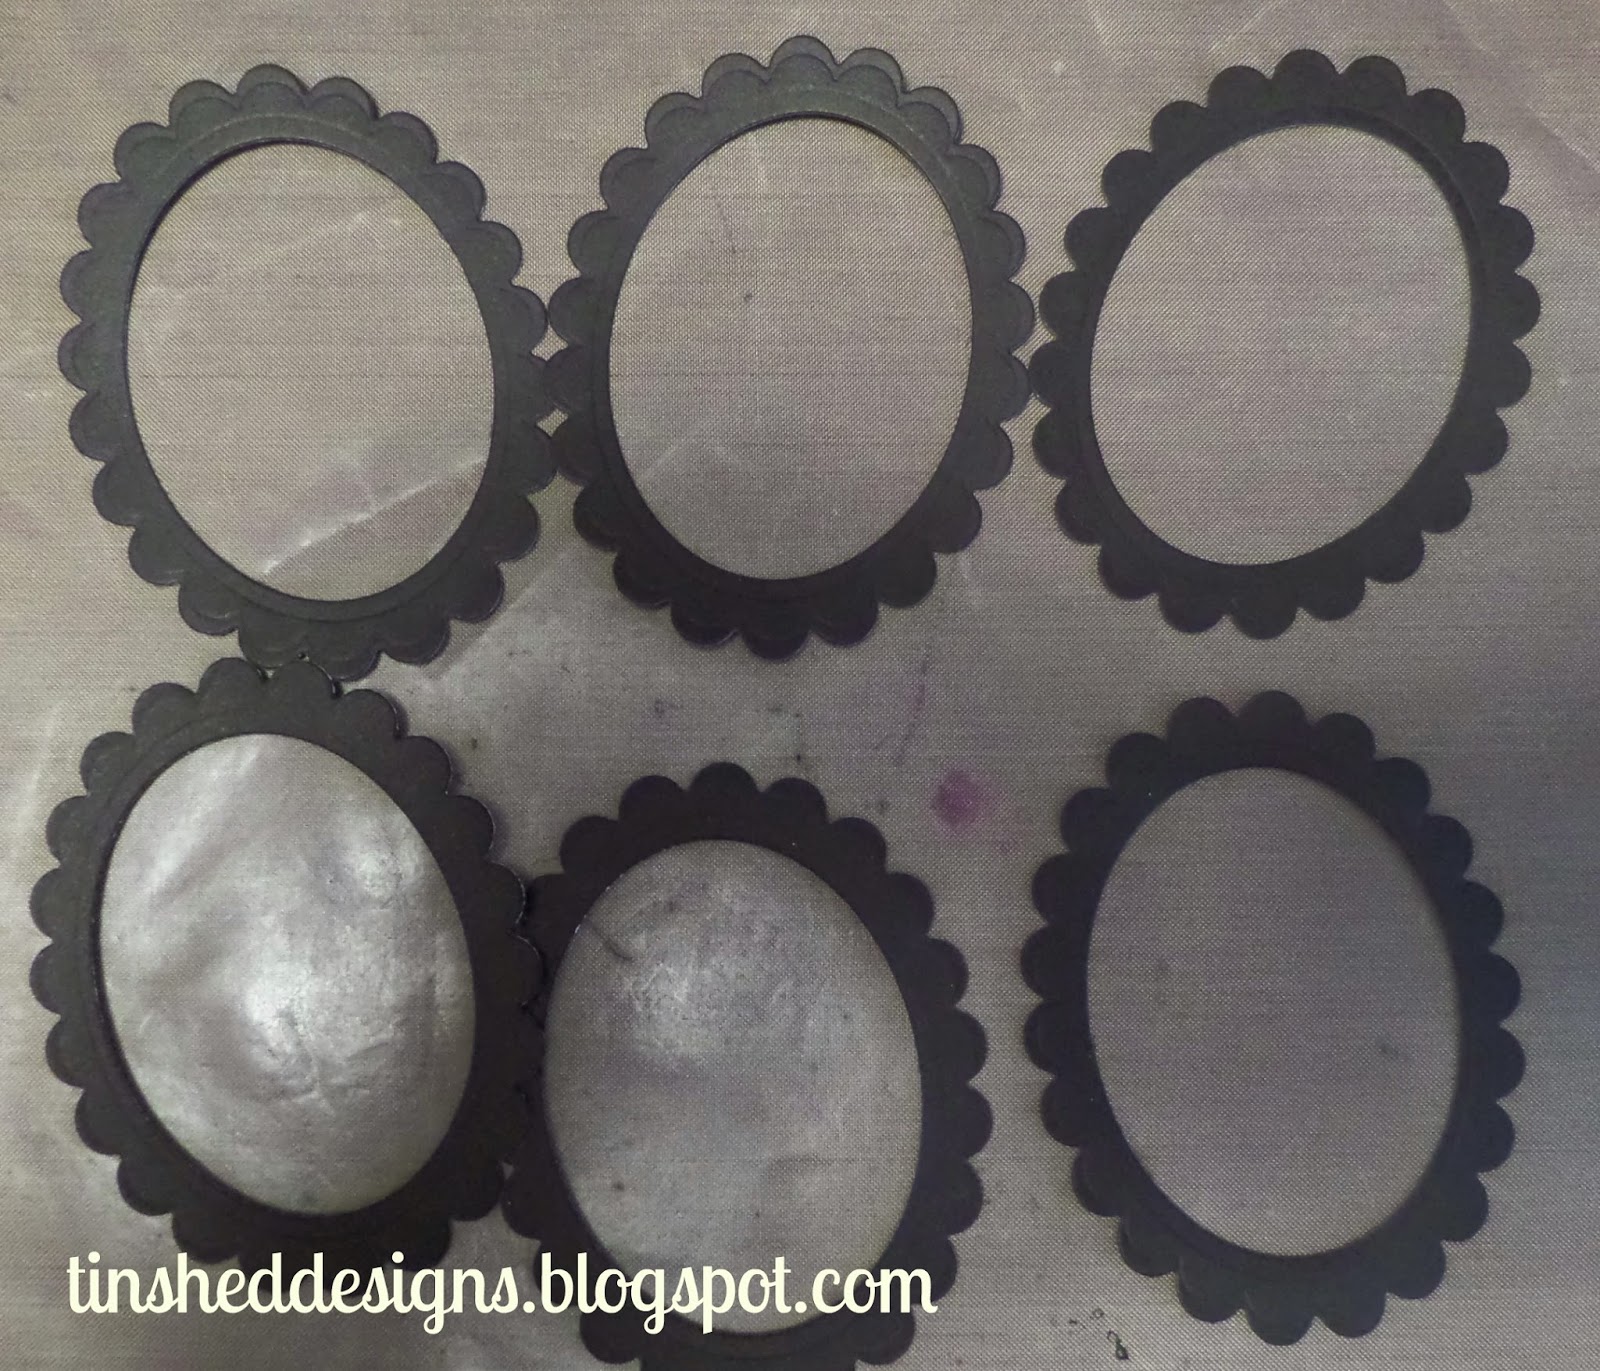
I could have quite easily designed the shaker portion of this card on Design Space and cut the scalloped frame with my Cricut Explore, but to be honest, I have just about every type of crafting supply in my "arsenal" that I feel bad if I don't use them once in a while.  That being said, I pulled out my Spellbinders Dies and cut the frame.


I used Post It tape to hold the dies in position and ran it through my Evolution machine.  I used the tiny polka dot print paper from the Snowhaven Paper pack.


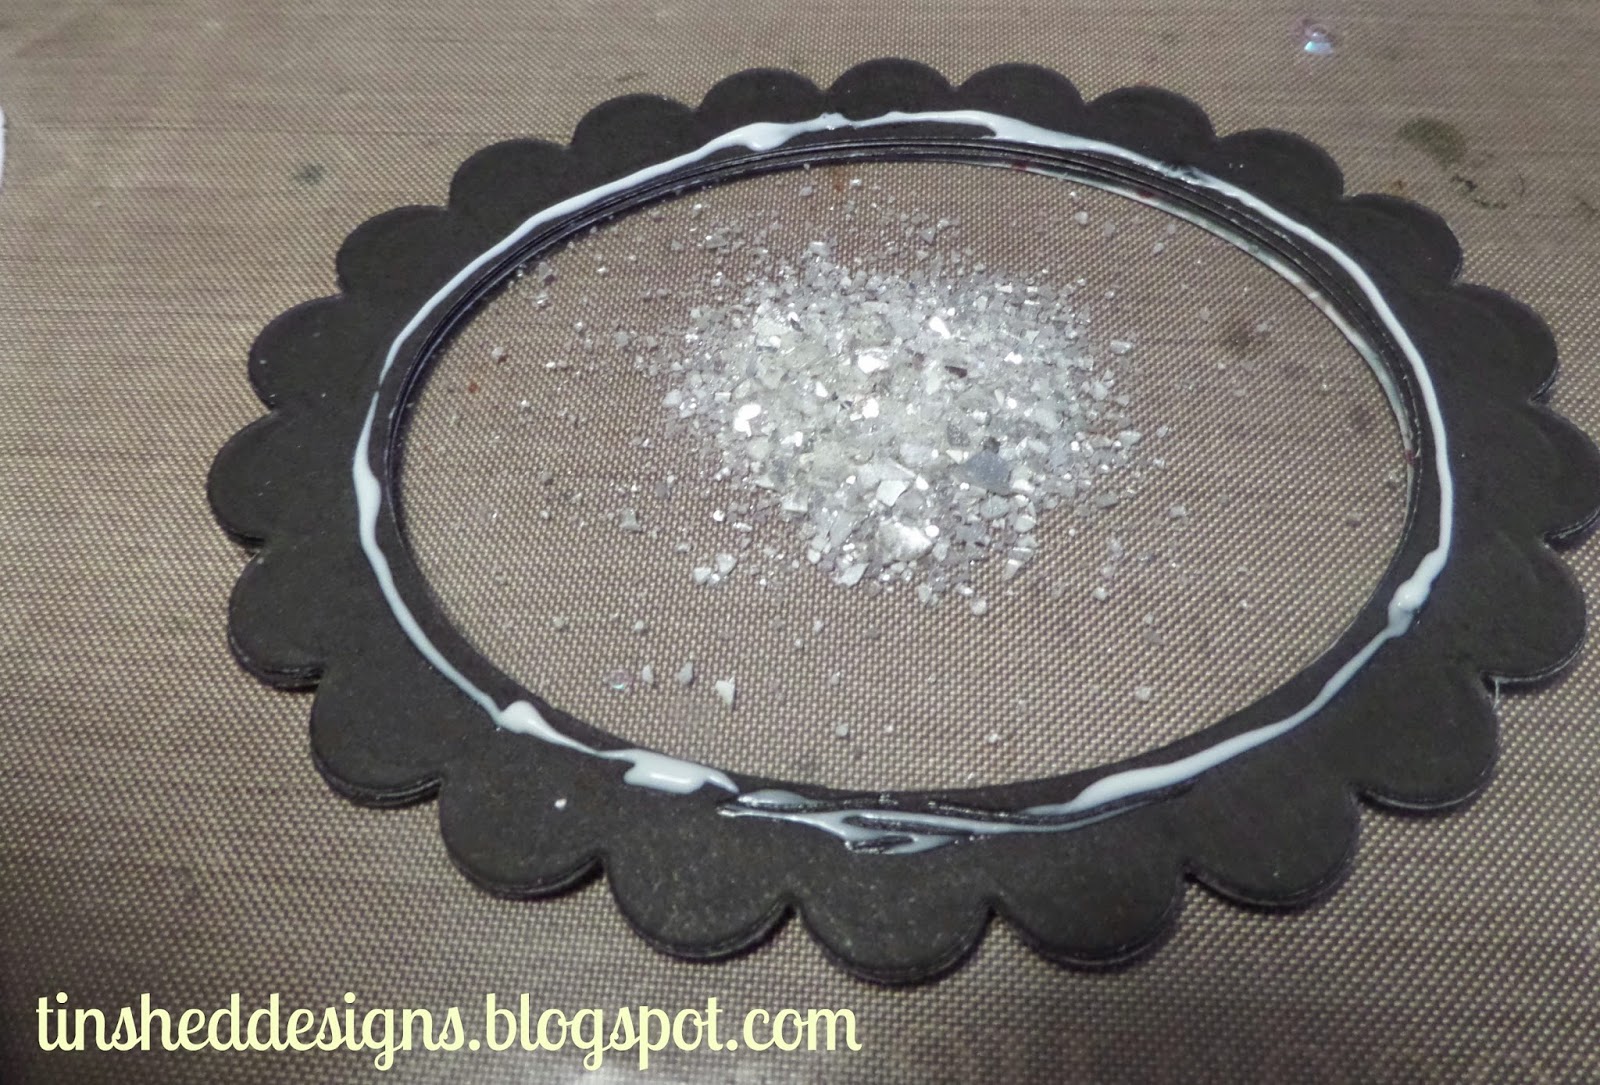
Once the frame was cut, I pulled out some Black cardstock and cut 6 more "frames" so I could create a sturdy space between the frame and the card base for the glitter to have room to "shake", lol.


The next step is to glue them frames all together.  For this, I used Bonding Memories glue pen, so I'd have a few seconds of "wiggle" time, just to be sure I could get everything lined up.


This is what it looks like when they are all glued together.  


Before I glued the printed frame to the stack, I glued a piece of acetate that I had cut to fit behind the frame.  I bought a box of transparencies at the thrift store, but you can easily find it for sale at your local office supply.  


I glued the transparency to the back of the printed frame, then I added the stack of black cardstock.  I set this aside for a bit and worked on coloring the snow scene image to go inside the frame.   I used the Frosty Fun stamp set for this image and colored it with my Shin Han markers in:


The reason I use so many colors is because I actually use my colorless blender to pick up color from the other pens and apply it to the image to build up a light layers of color to keep it very subtle.  

I sprinkled some home made glass glitter into the window area.  You can see the tutorial for making this glitter here.
I used Tombow MonoMulti glue to hold the frame to the colored image.  I just wanted to be sure there was plenty of "hold".  I could have used liquid glass, but to be honest, my desk was a mess and I couldn't find it, LOL!!!  I have trimmed the colored image down to fit behind the frame, and pressed it into place.   I set it aside to dry and went onto work on the card base.


I cut the card base from black cardstock to end up as a 5 x 5 inch card.  I then cut another piece from the Snowhaven paper pack  that is a beautiful tonal look of snowflakes on a black background.  I really like that print!  It's very subtle.  I also cut a strip of Gray glitter paper and cut it into a banner tail.  I attached the framed piece over the banner.  I decided I wanted my sentiment to be embossed in white, so it would "pop".  I used "Winter Wishes from the You and Yours stamp set


I'm showing the picture of the set because I want you to see that the original sentiment is on a single line.  I needed it to be stacked, so I cut the sentiment apart.  I could have inked up the word separately, but to be completely honest, I didn't want to take any chances that some of the ink would get where I didn't want it, so cutting it was the best option for me.  I can easily nest them back together the next time I want to stamp it in a straight line.


I stamped the sentiment in VersaMark ink,  and used the White Super Fine embossing powder and melted it with the Craft Heater.  The final touch was to add a few sequins from my stash.  CTMH carries silver sequins as well as gold, but I wanted to add a touch of aqua to my card, and since I had my box of sequins out, I just used what I had on hand.  


Here's one more close up of the shaker portion of the card.  

As always, if you have any questions, please just leave it in the comments section.


Monday, November 3, 2014

Wishing you the Merriest Christmas

Layered Christmas Tag


Christmas will be here before we know it and I've been working on my Christmas cards (which I've been sharing with you).  I still have many more to make, but I also wanted to get a jump on my gift tags.  I started out by cutting some simple tag shapes from my Art Philosophy cartridge.  The smallest tag was cut from the music printed paper from the Yuletide Carole Paper Pack.  The second tag was cut from the New England Ivy solid that came in the paper pack.  The largest tag was cut from Bamboo cardstock.

I stamped the Pine Tree from the Always Grateful stamp set, that I inked up in Ponderosa Pine.  Of course, I could have used New England Ivy ink, but to be completely honest, I like the blue undertone of the Ponderosa Pine for the tree.

The next step was to stamp the Merry Christmas sentiment from the Merriest Christmas stamp set, also in the Ponderosa Pine ink.

Through trial and error, I realized I needed to mask the phrase prior to stamping the swirl background.  My first attempt, I stamped and heat embossed the swirl as the first step.  I quickly realized this wasn't going to work with my final design because the embossed portion works as a resist when you stamp over it with the tree and the phrase.  I used masking paper I've had in my stash forever.  You could just as easily use post it notes.  If you aren't sure how to do masking, feel free to leave a comment and I will do a pictorial showing how to mask in stamping.

Once the sentiment and tree were stamped and had a moment to dry, I grabbed the large swirl from the Love Life stamp set and inked it up with my VersaMark ink pad and stamped all over the music print as well as the largest tag.  I covered the swirls with White Super Fine Embossing Powder, and melted it with my Craft Heater.

Now, this picture is from the first tag I was "experimenting" on.  I didn't take a ton of pictures, primarily because my desk is fairly small, and I'm doing several of this design in preparation for up coming "tag swaps" with friends.

The next thing I did was to sponge the edges of the tag with Bamboo Ink.  Without this step, the tag looked a little "flat", and it was screaming for some added dimension.  

Once that was done, I decided to add some liquid applique to the tree to look like snow.  CTMH is not currently carrying liquid applique, so I don't have a link for this product.  Once the liquid applique dried, I heated it with the Craft Heater and watched it "poof" up.  I love watching that happen!!!  And of course, I love to bling things up to the fullest, lol, so I added glitter glue to the snow.


While that was drying, I heat embossed the largest tag to match the tree tag.  On the backside of the largest tag, I decided to stamp the same swirl in Bamboo ink to create a tonal look.  This is where you will put your message to the recipient of the gift.  I would suggest you stamp the back side first so you don't have any interference from the raised heat embossed swirls on the front side.


Now that the glitter glue has dried on the top tag,  I went back and added some vintage sequins to the front.  CTMH sells some self adhesive sequins in gold and silver, but I felt the tag needed a pop of red.  When I pulled out my little box of vintage sequins, I also saw some pretty white sequins and decided to use both of them together.


I attached the sequins with Liquid Glass.   I also wanted to reinforce the hole in the top of the tag.  I used some hole reinforcements you can get at the office supply store.  I wanted to make them green, so I got out my Sap Green ShinHan marker and dabbed the ink onto the reinforcers and allowed them to dry.  My reinforcers were slick and shiney, but I've seen them look more paper like, as well as some that look like fabric.  For those types of reinforcers, I would simply scribble the color on.


I would like to take a moment to say that I used my All Purpose Mat, so I would be able to lift the reinforcers off with out any problems.  In addition, the ink can be wiped off the mat very easily.  I keep this mat on my desk at all times.  It has made my life SOOOO much easier.  I have had the "craft mat" that Ranger sells since it came out.  It works great, but the CTMH All Purpose Mat, is heavier weight, and lays flat immediately out of the box!!!!  Also, one side is slick, which is the side I use, ALWAYS.  The other side is, for lack of a better word, sticky.  This keeps the mat still on your work surface so you aren't "chasing" it all over your desk.  LOVE IT, LOVE IT, LOVE IT!!!!


The final step was to layer the tags together and add the ribbon.  I used seam binding in colors that I felt looked nice with the rest of the tag.  I didn't have any seam binding in red, so I took a length of white seam binding, dampened with water, and then placed it in a plastic bowl.  I added a few drops of Cranberry Re-inker to the bowl and smooshed the ink around in the ink.  To dry it quickly, I just used my Craft Heater.  Once that was done, I took several lengths of ribbon and looped it through the hole in the top of the tags.

Here's one last look:


If you are interested in any of the products used, simply click on the highlighted name of the item in the tutorial above.  You will be directed to my CTMH website to easily place your order.   

Please feel free to ask any questions you may have in the comments section below.  Simply click on the pencil icon to open the "comment" box.

Thanks Everyone!  See you soon!!!