Saturday, February 7, 2015

Ever had one of THOSE days?

 I have never been accused of being a graceful person, and for very good reason.  Today, I had hoped to finish the 4 signs I started a couple days ago, and I was making decent progress until, as usual, my natural clumsiness took over, and I spilled about a quart of paint from the gallon I was trying to move.  I hadn't put the lid on tight, and somehow I managed to catch the bottom of the can on my work surface and it tipped over.  Sky Blue paint splattered all over the floor, as well as onto my shoe, another can of paint and my vacuum cleaner!  I work in a somewhat confined area in my house, and on a good day, it can be a challenge.  Today, I had about 12 cans of paint all sitting on the floor around my work area, and I had been tripping on them all morning.  I had just finished telling my husband that I needed to put a little book case or something next to the area where I do all the painting, to hold all the cans of paint I keep dragging in the house.  I guess I'll be making something from some of the Pallets I have in the barn to hold the paint!  Anyway, because I had to stop EVERYTHING I was doing to get the paint mopped up, I decided that after cleaning up my mess, I was going to call it a day.  I managed to get 2 of the 4 signs completed.  

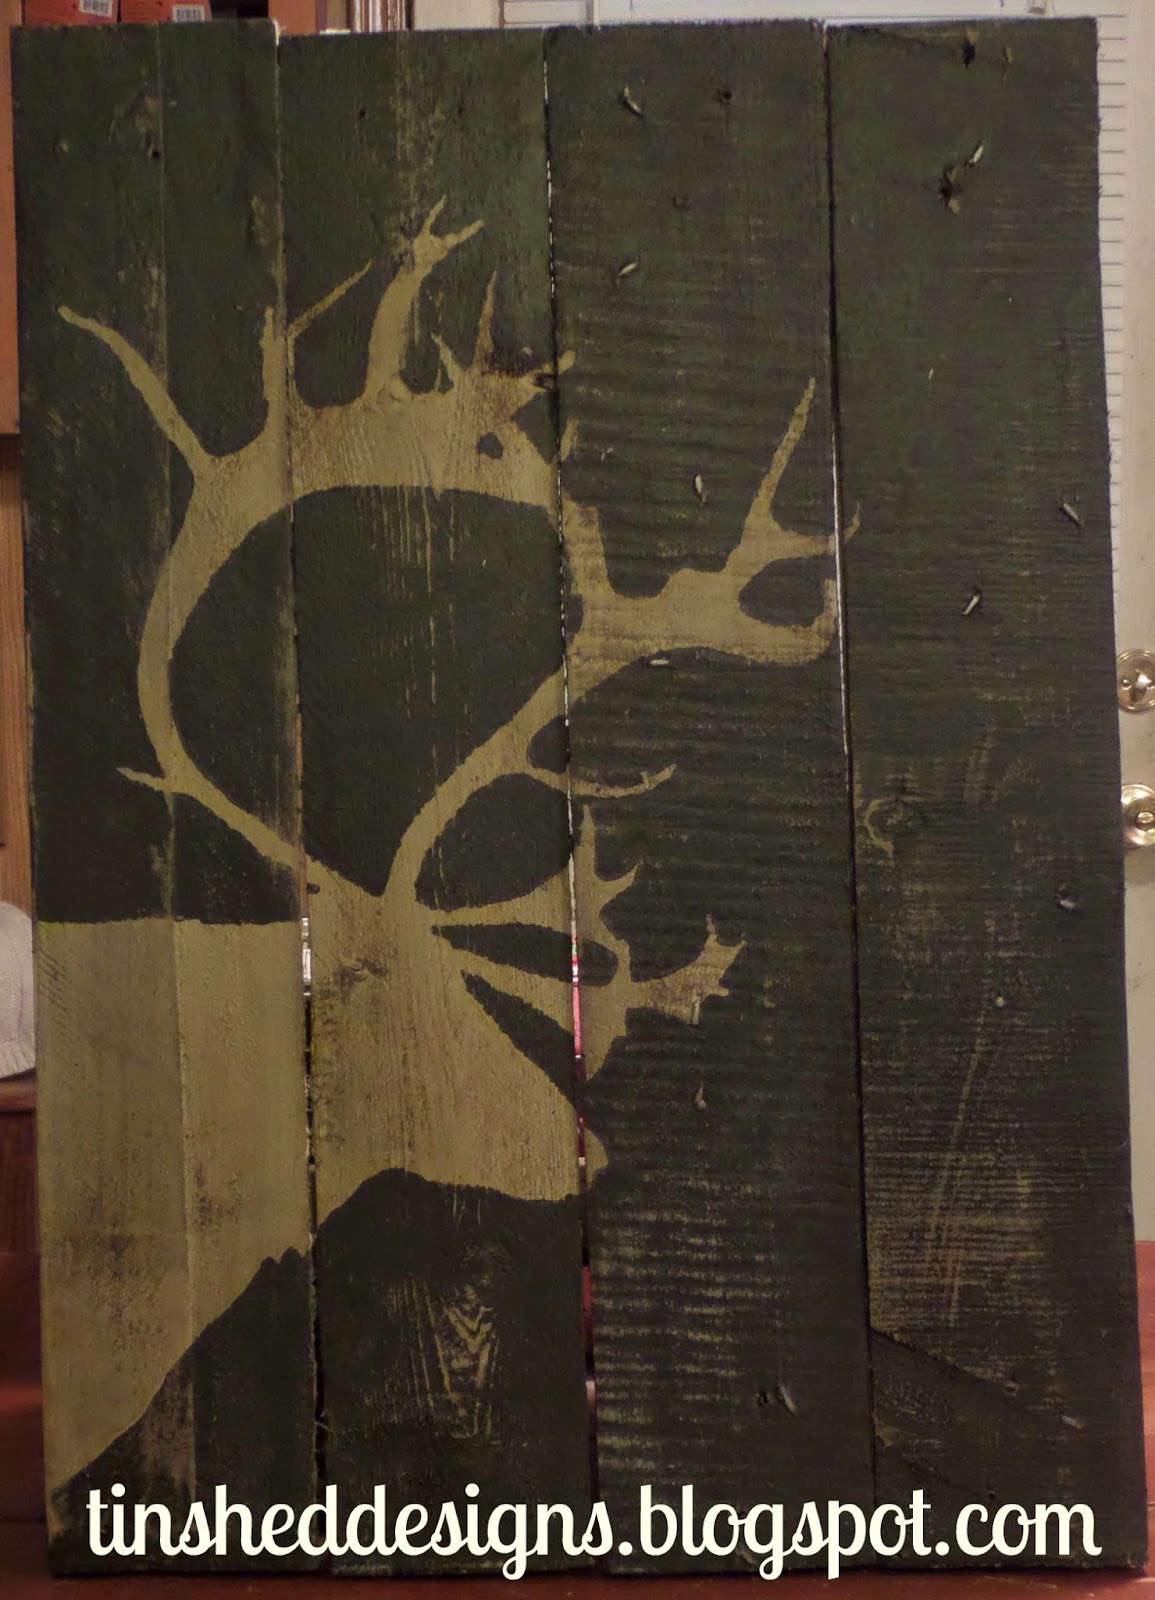
The first one is simple, and I really like it that way!  I love the Deer Silhouettes I made a couple weeks ago, but I'm noticing that same silhouette is showing up EVERYWHERE!  I decided to do something a little different, and went on the search for a nice Caribou Silhouette.  I'm really happy with how this turned out.  Very simple, very rustic.

The other sign I finished today is a sentiment near and dear to my heart.


I was working on the other "Life is better on the Farm" sign, done on pallet boards when I had my little mishap, So it will be a day or so before I can get it posted.  I'm also making another "Life doesn't have to be Perfect" sign, which will also be posted in a couple days.  
 I am  hoping to have several new signs to post in the next few days.   That is, provided I don't trip and break something, which is ALWAYS a possibility with me, lol!

As always, if you have any questions, or would like to discuss a custom order,  just click on the "contact me" button.

Thanks everyone! 


Tuesday, February 3, 2015

A New Batch of Signs


Once again, I apologize for the photographs.  I'm having trouble with the lighting in my workroom.  It's early February in North Idaho, so it's dark and dreary outside that there isn't any natural light to begin with.  But to be honest, even if it was gloriously sunny outside, there is only 1 tiny window in my workroom, so I wouldn't get much natural light anyway!  The existing lighting is HORRIBLE!!!! So, I've been experimenting with clip lights, which aren't working out so well.  I am going to keep trying to find a workable fix, but until then, I hope you all will forgive my less then inspiring photography!  Like the sign above says, Life doesn't have to be Perfect to be Beautiful, lol!

That all being said, I've just finished another small group of signs and I wanted to share them with you.

The Man Cave 
10.5" x 16"
 25.00

I am the mother of 3 wonderful sons, so of course, I had to make a Man Cave sign, lol!    I bet you can think of a man or 2 that would love his own Man Cave sign.

Whenever I get Sad  
13" x 16.5"
35.00

I love this saying!  I think I'm going to post it ALL OVER MY HOUSE!  

Smile and Wave  
13" x 16.5"
35.00

Who doesn't want to feel like a Princess?  The crown has been covered in a combination of chunky gold glass glitter and outlined in old gold glitter.  Here's my attempt at a close up of the glitter, lol!


Life Doesn't Have to be Perfect 
14.5" x 18"
 45.00

I love this sign!  The sentiment is a great reminder of finding joy in your life and not waiting for it to be perfect to enjoy it.

My last sign was spoken for before I could post it, but I wanted to share it anyway.  I'll be making more of these.  

Welcome Friends 15.00

Here's a close up of the background 

Well, that's it for today.  I've got several more signs in various stages of completion.  I hope to get some of them posted in a few days.

As always, if you are interested in any of the signs shown, or would like to request a custom order, just send me an email using the link at the top right side of this page.


Friday, January 30, 2015

Now Available for Sale!


I posted the "before" version of today's signs last week, but after a little creative time this morning, well, TA DA! 
I have to admit, I'm super happy with the lighted sign.  You can't see it in the picture (sadly), but the background has been dusted with super fine glitter, which gives a subtle sparkle to this sign.  Honestly, the picture just doesn't do it justice.  This sign measures approx. 11 x 18  and comes with  the 10 count string of battery operated lights (2 "C" batteries included).  
45.00


This sign is a little more subtle.  The background is a pretty olive green, and the deer silhouette is a mottled grey, outlined in gold metallic.  This sign has been sealed with a hand rubbed wax finish.  It is larger then the black and white sign, measuring approx.
15 X 23
40.00

Here is a close up of the outline:

This is another 11 x 18 sign :
The background on this sign is Olive and the silhouette is a light gray.  The sign has been distressed and sealed with a hand rubbed wax finish.  Finally, I wrapped some vintage fence wire around the top for a little added interest.
30.00


Here's a close up of the wire detail:


If you are interested in purchasing any of these signs, you can email me directly.  Use the link at the top right side of this page.  I will be posting them in my etsy store soon.


Tuesday, January 20, 2015

Deer Silhouettes

My First Pallet Signs!


I've been working for the last several days setting up an area in my mud room for painting and drying sign boards.  I have this wonderful bakery cooling rack that I purchased a few years ago at a yard sale that was missing all the baking sheets that would serve as shelves.  My sister suggested I cut some boards to size (from some laminated shelves I was storing in the tack room out in the barn), and use the rack to dry the sign bases.  She's the smart one in the family, LOL!!!  It never dawned on me to use this rack for that purpose!


Prior to this, I was only able to paint 2 or 3 boards at a time, and I had them set all around the house to dry.  Of course my cats thought this was the perfect place to sit, LOL!  Now, with this rack, I can paint 12 boards and have a safe place for them to dry, YAY!

Anyway, the other day, I pulled apart a pallet I had in the barn and cut the boards to varying lengths to make a few signs.  The wood  from this pallet was REALLY rough.  I tried sanding down the worst of the roughness, but, it wasn't much help.  I decided to go very rustic with whatever designs I decided to put on the boards.  Here's my first set of signs from the boards.

These 2 signs measure 11 x 18 and the larger signs (shown in first pic) 15 x 23.5 

I'm thinking about adding some rusty barb wire or some old fencing wire (no barbs).  Possible outlines on some of the silhouettes?  Anyway, I'll post more pics when they are complete.  I just wanted to keep y'all in the loop.  

Here's one more pic to give you an idea of the size differences:


If you are interested in purchasing any of the signs I post to this blog, or have a custom request, please email me at idahoelly@gmail.com

I have also opened a GoFundMe account to help with start up costs as well as to help with the overhead of the rescue operation.  If you are interested in donating, please go to:


Monday, December 29, 2014

2015 Is Bringing BIG Changes!

A New Year is coming, and it's bringing BIG changes!


For the past several months, I've been creating small projects for my Close To My Heart business, and posting them here.  While I have enjoyed the process greatly, I have come to realize that I am not selling enough Close to My Heart merchandise to support the animals here at the ranch, as I had originally hoped.  I will continue to be a CTMH Consultant, for as long as I can maintain the minimum sales required to do so, but I am now going to be focusing my energies on projects that I will be selling as "Completed Art Pieces".  I have been receiving a lot of encouragement to start selling the finished pieces, and I've decided to give it a go.  

I have been making "something from nothing" for the better part of my life.  My sister and I were "recycling", "upcycling", and "altering" items since long before it became the fashionable thing to do.  Thankfully, I have a barn FULL of items, patiently waiting for their turn to be turned into something FABULOUS!  So, the first items I pulled off the shelf were some old cabinet doors.  I wanted to paint some signs as Christmas gifts, and these old doors were going to make the perfect base.

I apologize for the quality of the pictures in this post.  I took them with my phone and didn't have a chance to get better pictures prior to giving them as gifts.  I will be spending the next few days creating more signs, and will happily post them when they are complete.

I plan to make several of these as Garden signs to sell at an upcoming Spring Sale.


My "Weed or Wish" sign has been very popular.  I need to get some more of these made up! 


I thought this was a lovely sentiment:


Well, that's about all I have for today.  I'd love to get your feedback on my signs.  I'll try to be a little better about posting more often, but between working at JoAnn's, keeping up with the Farm chores, regular household chores, and trying to create items to post (and sell) well, it's a juggling act to be certain!!!  If you are interested in obtaining information about any items you see posted on this blog, please feel free to leave a comment, or email me directly.

Happy New Year, dear friends!!!


Wednesday, December 17, 2014

Super Quick Christmas Decor Idea

Big Impact, Little Effort


First, let me apologize for the long gap in posting.  Like everyone at this time of year, I'm swamped with a list of "things to do".  Add to my normal hectic life, I've been working an average of 32 hours at the closest JoAnn Fabrics store (an hour away!!!)  I'm frantically trying to do my part to support the animals here at the ranch.  Anyway, I made these plates last week, but just haven't had one free minute to take pictures or write this post.  Thankfully, I have a couple days off from work, and I'm sick as a dog with a terrible head cold, so I'm taking the opportunity to write this post.

I few months ago, I went to Goodwill to pick up a large selection of white plates and platters for an idea I had for my garden fence.  Since I didn't get that project finished for "Gardening season", surprise, surprise, I decided to make some of them up for a quick Christmas Decoration.  The plates averaged .49 cents, and the platters were 1.49 each.  I bought up stacks of them!


I used Art Philosophy and Artiste cartridges to write the phrase components with the exception of the Happy New Year plate.  For that plate, I used an image from my subscription for the Cricut Explore Design Space.  Working with vinyl is a lot of fun, and SUPER easy!  The primary goal is to do a "kiss cut", so you are not cutting all the way through the backing material.  I will happily do a tutorial on the process at a later date, but sadly, the next week or so is going to be completely absorbed with finishing (or more honestly, starting) Christmas gifts, and just won't have a chance to do all the necessary photos for the tutorial.  If you are chomping at the bit to get started, I promise, there are LOTS of video tutorials all over Youtube.


For the "Walking in a Winter Wonderland set of plates, I used Art Philosophy again for the snowflake and lettering, except for Winter Wonderland.  For that, I actually used a font from my computer.  That is one of the real beauties of the new Cricut Explore machine.  I am not affiliated with ProvoCraft, or Cricut, but I am a huge fan of this machine! 


For my last set of plates, I used images from my design space subscription.  The only exception is the Deer with the bird in its antlers.  That image is from the new Artfully Sent cartridge.  I really love this little guy!

Anyway, I'm really sorry this is such a lack luster post, but I wanted to share this idea with you.  I think it could very easily translate to any season, or design idea.  The best part is that the vinyl is removable, so you aren't stuck storing the plates til next year.  You can scrape the vinyl off and design something for the next season.  In a really tiny home like mine, storage can be a bit of a problem.  Luckily for me, I have a barn, but to be completely honest, I have way too much stuff out there!


Here's one last look.  I hope you like it!

Wednesday, December 3, 2014

Altered Golden Book

My Little Christmas Planner


A few years ago, I made a little book for keeping my Christmas lists, craft ideas, sketches and so on.  That first book was made using chipboard and Christmas papers, and LOTS of embellishments.  I loved that little book.  I literally carried it everywhere with me, and when I found the perfect gift for someone, I made notes, either about where to purchase, or better yet, my ideas on how to create my own version of the item.  I was planning on showing pictures of that book, but as luck would have it, it was nowhere to be found.  I know I still have it.  It's just not where I thought it would be, lol!!!

Shortly after making that book, I saw a YouTube video of an altered book made from a Little Golden Book, and I thought it was a really cute idea.    If you'd like to watch that video, I have linked it here.   I thought it was a fun way to re-purpose a fond memory of not only my childhood, but also my children's.  I didn't want to destroy the wonderful artwork and story in the book, so rather then use the existing pages as a base for putting my own pictures on, I decided to add note pages, and dividers with pockets and tags, interspersed between the original story pages.


I used the Picture my Life cards from the Pear and Partridge pack as removable note cards.  The picture above is the back cover of the book.  I added a simple pocket to hold several of the cards that I thought would be nice if I needed to pass on a note or list to a friend or family member while out and about.  I always seem to be searching for a piece of paper to write something on when I'm out shopping, and I thought this was a much prettier way to give someone that information.


I have a pretty good collection of these Little Golden Books, (big surprise, lol!) so I pulled out a few of the Christmas themed ones and decided to use the Santa's Toy Shop book for my little planner.


The next step was to disassemble the book.  I simply cut the spine away.


Once I had the book apart, I started decorating the cover.  I used the Yuletide Carol Compliments for the title.  I also used the flower from the Mini Medley Accents Ruby Collection.  I added several vintage sequins that I've collected over the years, but new ones work just fine.  I have to admit, as much as I really like the Christmas collections Close To My Heart has this year, I have been using them so much lately, that I really wanted to take a break and use something different, so I dug through my stash and found some Christmas Paper Packs I had purchased a couple years ago.  Both were Recollections paper packs from Michaels.  


I honestly have no idea whether these papers are still available, but I'm sure there are plenty of options available out there.  Anyway, I used my Cricut Artbooking cartridge to create dividers.


On the opposite side of the divider, I cut a rectangle of a co-ordinating cardstock to make a pocket.


Once I had all my dividers made, I simply arranged stacks of writing paper, graph paper, dividers, original story pages, as well as the front and back covers in a way that I liked and punched the binding holes with my Cinch binding machine.  After punching the holes, I wound the coil through the holes and bent the ends to keep it from un-coiling.   

Here are a few more pictures:


Front cover with pocket also made from Artbooking and decorated with a cute sticker from Yuletide Carole Compliments.


Look, the pocket is the perfect size for the large Picture My Life cards!!


I love the original artwork in these books and I didn't want to lose any of it, so I just added the story pages in behind the note pages.


I added an envelope to one of my pockets.  You can certainly use your Cricut machine to create these envelopes, but I happened to have a package of them that I had purchased at Michaels, so I decided to use one of those.  Since I didn't custom make the envelope, it was a little to long, so I folded up the end and used another sticker from the Yuletide Carole Compliments to hold the fold in place.


As I stated earlier in this post, on the back cover, I made another pocket and added a bunch of Picture My Life cards in both sizes.  You know how we're always looking for something to write on when see someone at the store?  Well I thought I would use the cards to write what ever message or contact info I may want to give them.  Not only is it a pretty way to give that info, but I bet they will be less likely to lose something like this in the bottom of their purse or whatever.


So, that's it for today.  I'm soooooo sorry it took me so long to get this posted.  I had to go back to working outside the home to help support my rescue critters.  Between the 32 hour work schedule and the 1 hour drive each way to get to work, well, I'm really struggling to get everything done.  Not to mention the fact that I went back to working retail, which means being on my feet all day and lots of running around the store to help customers, which is REALLY proving to be hard on my legs and especially my joints.
I'm thankful for the job, as I would be crushed if I had to try to rehome the critters in my care.  I will do whatever is necessary to provide for them, including adding more to my already busy schedule.   I will try to keep my posts more regular, but please, bear with me while adjust to my new responsibilities.  I will be decorating this little planner and posting those pictures as well as  doing other more simple projects in the near future.  

One last note, this project is certainly NOT limited to a Christmas planner.  This would be adorable as a little scrapbook for a baby shower, or first day of school or really, just about anything you can think of.  Since there are literally thousands of Little Golden Book titles out there, I'm sure there's a book that will work for any project you may have in mind.  And trust me, no two finished altered books will ever be alike, so you know you are giving a unique gift, or creating something for yourself that no one else will ever duplicate exactly.

I hope you enjoyed this LONG post, lol.